Homelab isolation with pfSense
If you are continuing on from my earlier homelab post, I mentioned that doing proper network isolation is very important when working with malware samples or doing any kind of reverse engineering work. There are other practical reasons you may want a separate network for your virtual machines, a good example is building your own Active Directory Domain and Domain Controller(s).
Like the first post, this contains some tips that I wish I had known starting out. I hope that it helps you out. This guide is very similar to pfSense’s virtualization guide, but with some additional commentary around InfoSec specific labs/virtualization.
Note: We are only going to discuss virtual IPv4 networking, IPv6 is disabled on my pfSense interfaces, but link-local addresses are still enabled for compatibility.
Moving from VMware Workstation/VirtualBox to Type 1 Hypervisor
When you move from VMWare Workstation / VirtualBox / Parallels (Type 2) to something like ESXi, you may notice that some key networking options have disappeared. The thing I neglected to take into account was NAT’d networking options
|
|---|
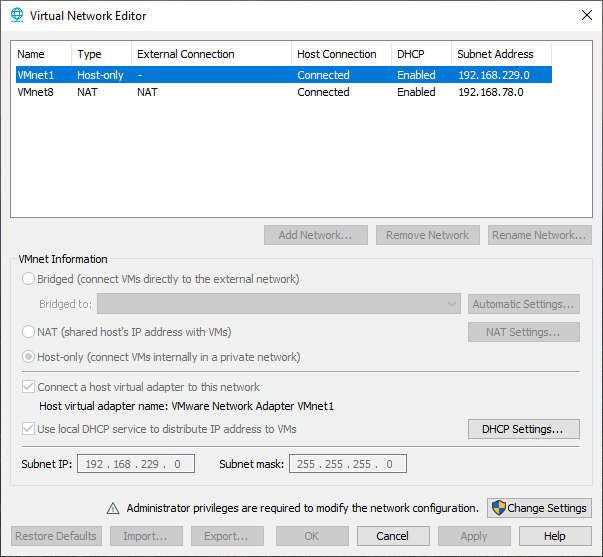
| This is what you are probably used to |
Notice when you create a new VM in ESXi, the default network connection for a VM is going to be bridged and your VM will grab a DHCP lease from your local network if available.

|
|---|
| VMkernel / Virtual NICs. |
So how do you get around this constraint and into something more familiar? The answer is Virtual Switches and Port Groups!
By default ESXi, has a vSwitch0 that is tied to your management network interface. You can create a second vSwitch that does not have an uplink to another network connection. Below is an example
|
|---|
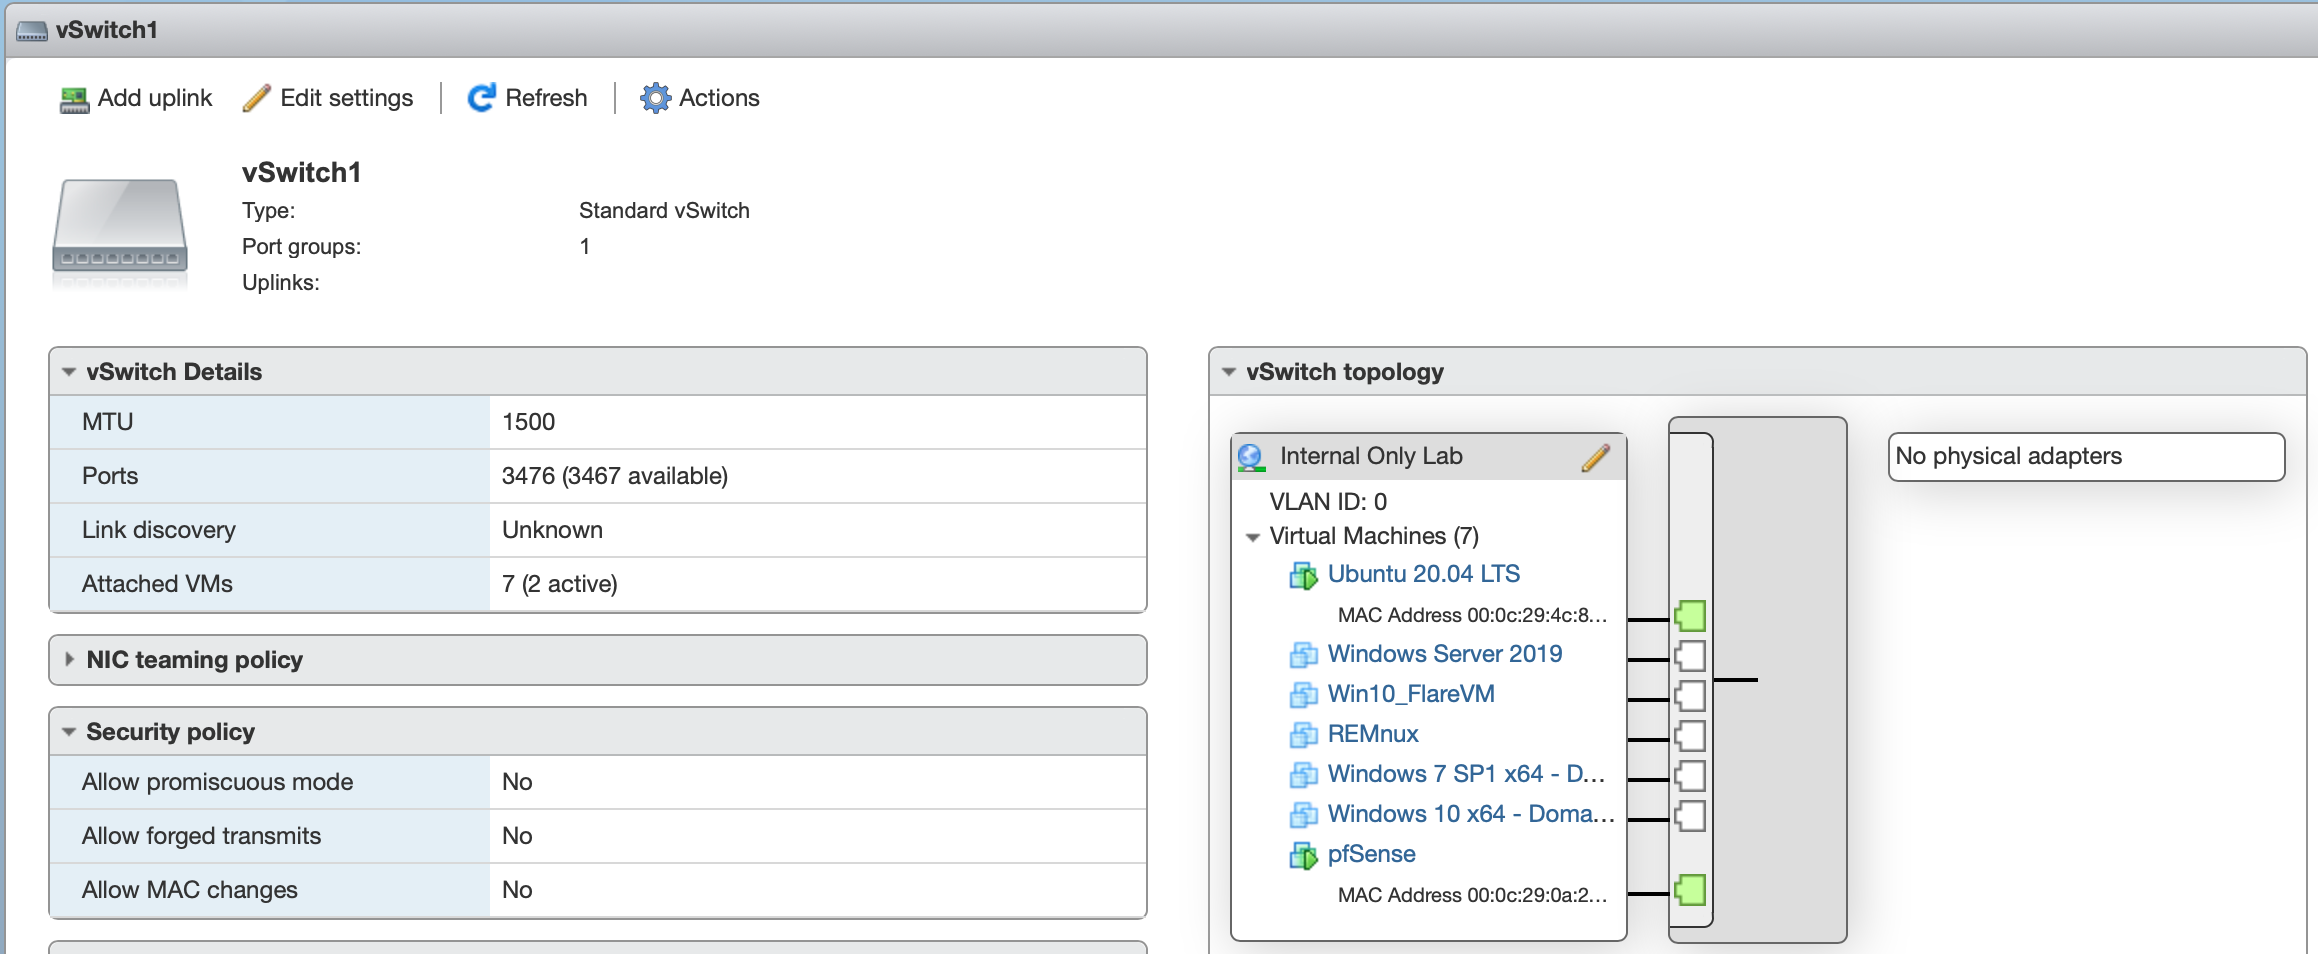
| Look at the vSwitch topology, no physical adapters or other uplinks! |
You can see some sample options and that my virtual machines are not connected to a physical NIC or other interface that gives access to my local network. This vSwitch1 will become my isolated “Internal Lab Only” network. You can do this by associating this virtual switch with a “Port Group”.
This is all fine and well, but how am I going to get routing/DHCP/NAT (optional) and all of the other cool stuff that my Type 2 Hypervisor did for me?
Enter pfSense
You don’t have to use pfSense, but you need something that allows for proper routing and a firewall (the most hardcore will use iptables). pfSense is a really good option as it has a large community of users, is well documented, and is open source.
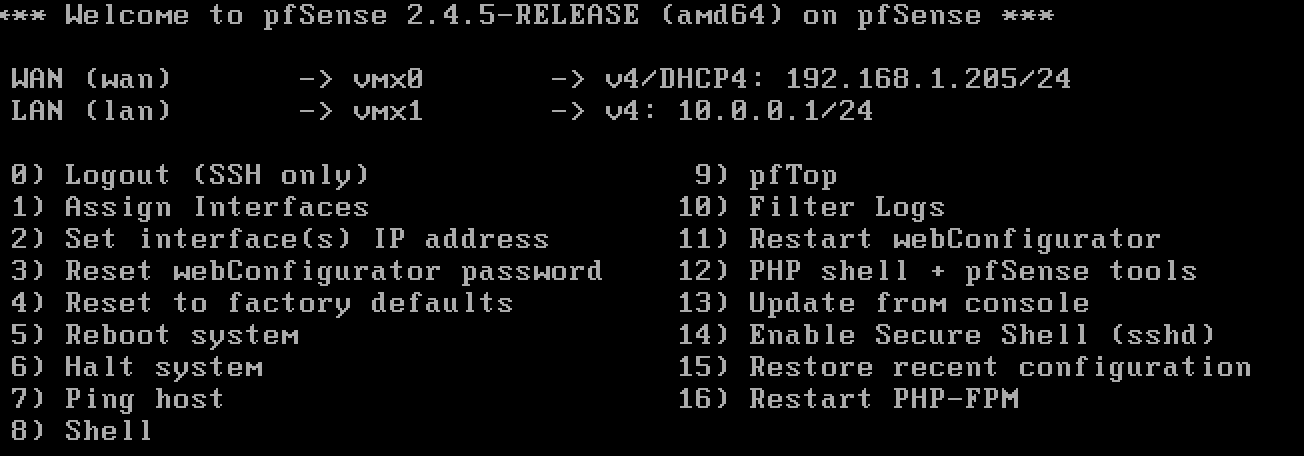
Since the intention of this post is isolating a homelab, I am not going to cover the installation process in detail. You can find that information via the Google or just use the official guide. I do suggest you double check your MAC addresses as you build your WAN and LAN interfaces to make sure they are correct.
| Here is what I wanted to accomplish: |
|---|
| (Internet) <-> (Home Network: 192.168.1.0/24) -> (virtual pfSense) - (Isolated Lab Only Network: 10.0.0.1/24). |
For my WAN interface I made sure that my home network router provided my pfSense a reserved or static IP address. I defined the LAN as a different private IP space (Its recommended to make these distinct to aid in any troubleshooting).
Once you get pfSense up and running, you can then start creating Virtual Machines there are assigned to the “Internal Lab Only” port group. With my particular configuration I did want to allow my VMs to have internet access. At this point we are still not isolated!
Note: For the scenarios where I dont want internet access, I can turn off my WAN interface and/or use something like “inetsim” along with static routing in my VMs to make sure traffic goes only where I want to it to (I am sure there is a better way to do this).
Let’s take some steps to keep our 192.168.1.0/24 network from talking to our 10.0.0.1/24 network and vice versa. What do we need here?
- DNS - We want to make pfSense the default gateway and DNS server. We won’t be talking to 192.168.1.0/24 anymore
- DHCP - Same story as above, but you may want to have a small pool of IPs dedicated for management on other VMs. (Ex: 10.0.0.2 - 10.0.0.150 can be assigned, but 151-254 are reserved.)
- Firewall Rules! - Lets do some simple enforcement in both directions to make sure these networks can’t talk to each other.
Basic Services
Here are some sample settings for reference as of pfSense 2.4.5, as with anything you find on the internet. Do not just copy and paste. Use my blog as a reference but verify and test!
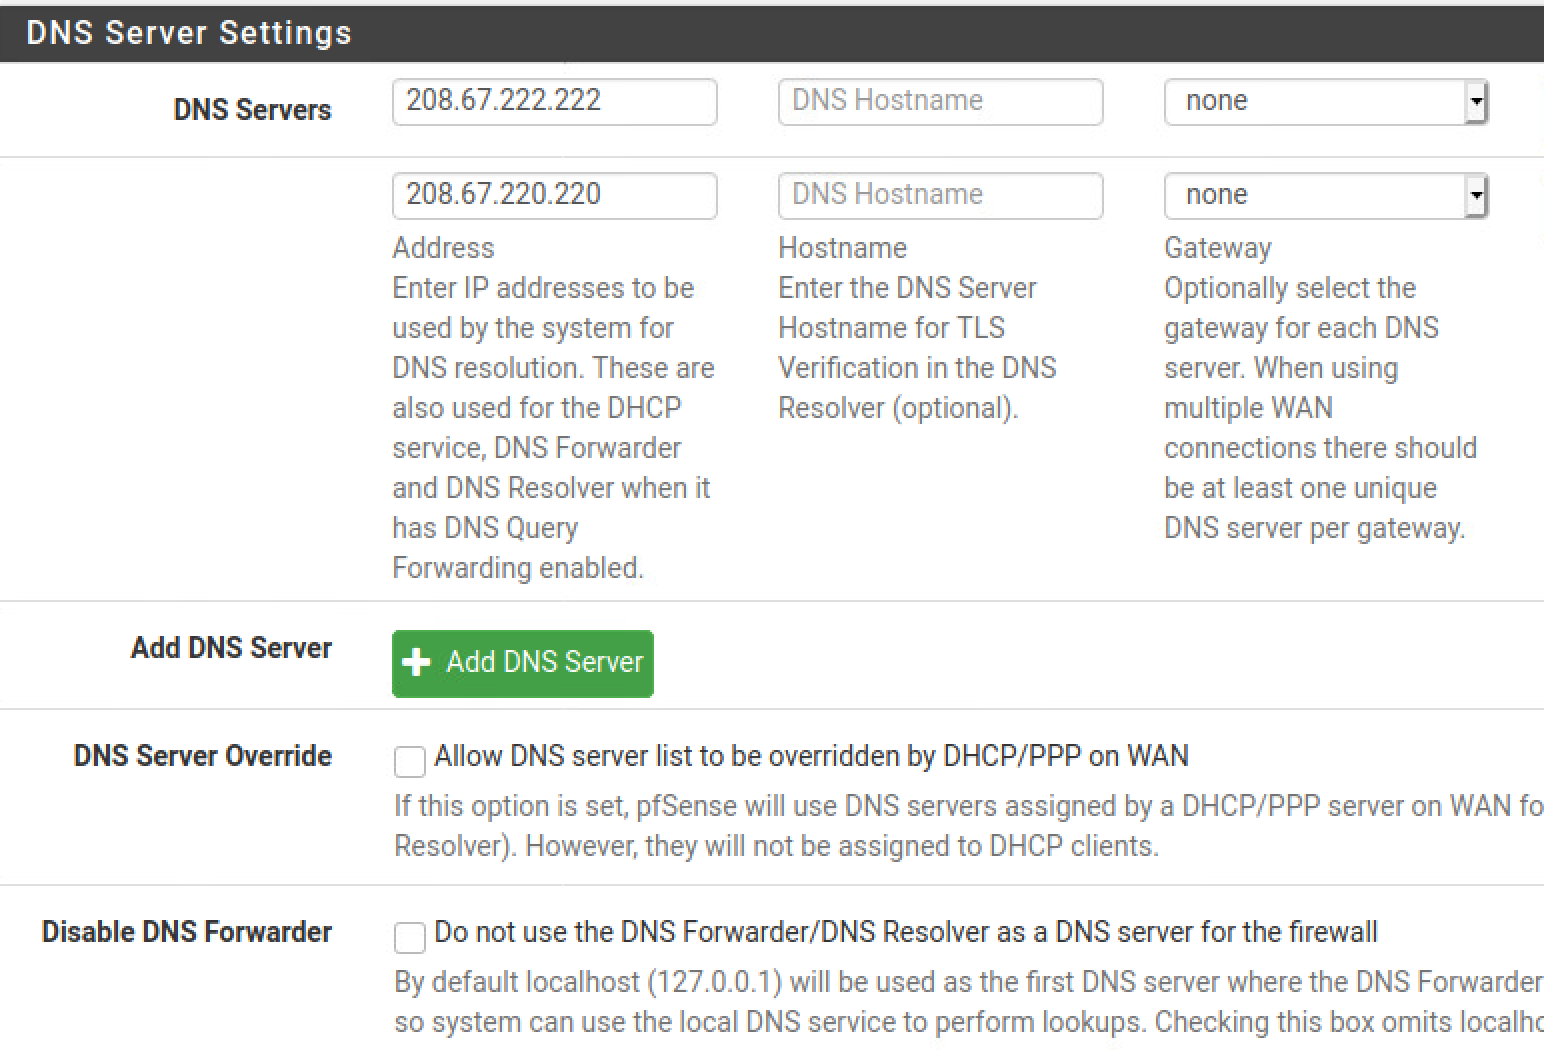
System -> General Setup -> DNS
You can use any public DNS provider here, I also choose not to let my pfSense box get its assigned DNS from the wan interface (DNS Server Override). I also want to use pfSense as a DNS resolver.
Also take a look under Services -> DNS Resolver and make sure you have the options you want selected. You may want to handle how DHCP hostnames are registered, or disable DNSSEC for example.
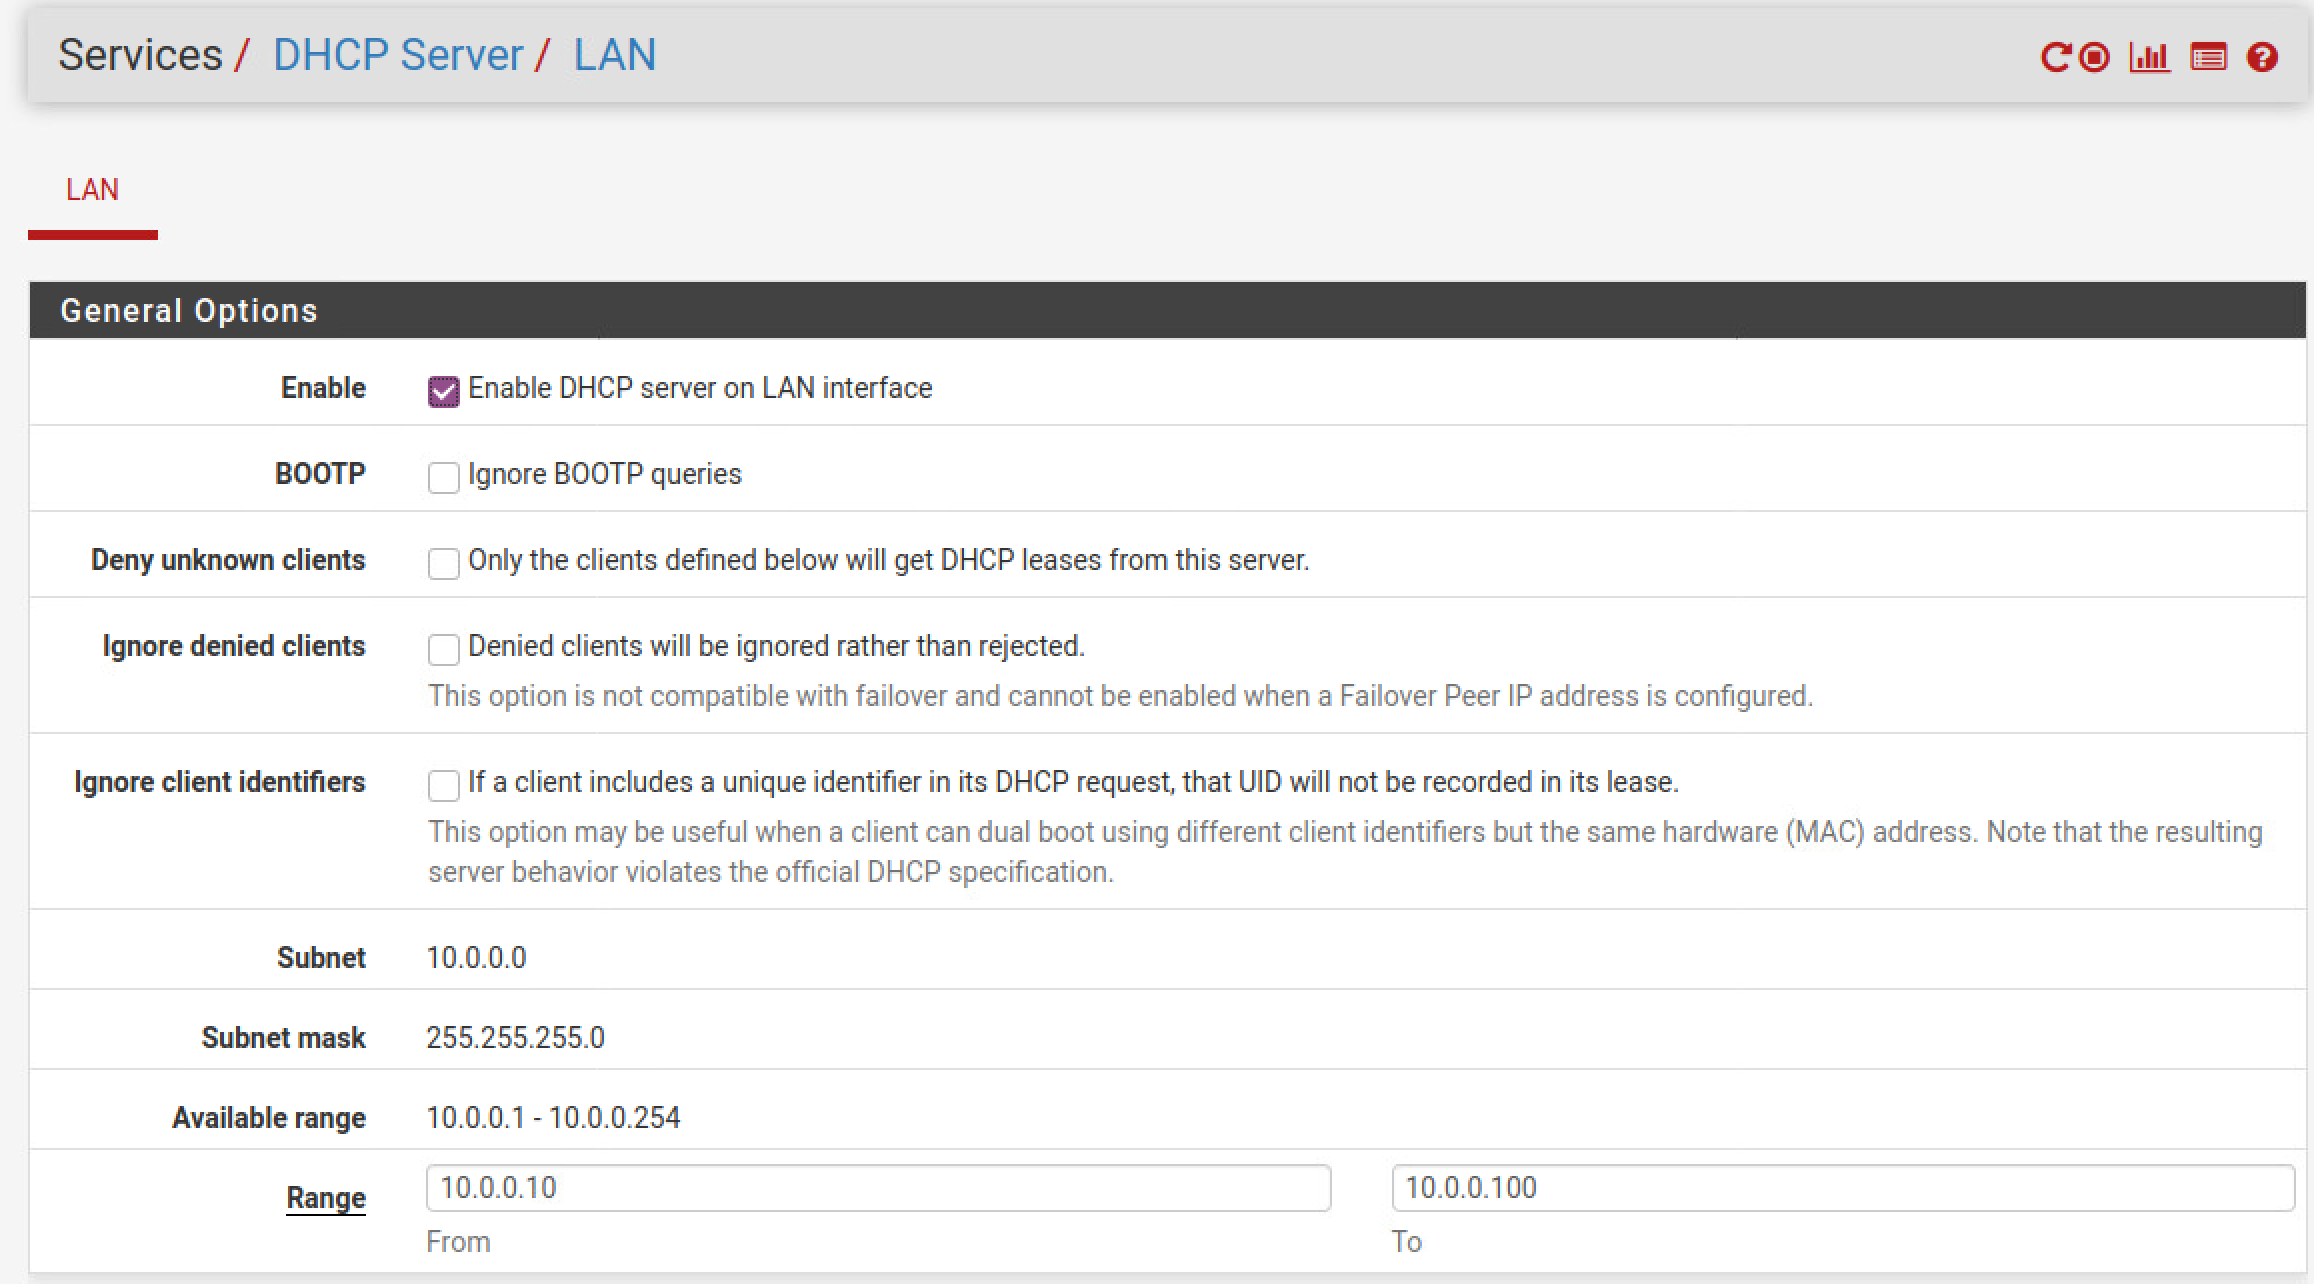
System -> Services -> DHCP Server
|
|---|
| Here is where you can define where your range starts and begins. At the bottom of this page you can set your DHCP reservations/static mappings. |
Firewall
Here is where we can enforce our network boundaries. If your WAN and LAN net are in private (RFC1918) IP space you want to make sure you change some of the pfSense defaults. Go to the interfaces page and check the following setting for your interfaces.

|
|---|
| WAN and LAN are both RFC1918 networks. Better not block them |
Now onto the firewalls page…
I have created the rules below and modified/removed some of the default rules to make this work for me. I am sure there are more elegant ways to do this, but it makes sense to me and my small lab. Note that my WAN and LAN nets are already predefined per their interfaces.
I recommend making sure you have a labeled config backup (Diagnostics -> Backup & Restore) incase you need to go back to a previous version of the firewall rules.
WAN Rules - I deleted all of the rules here. Traffic should be outbound only!
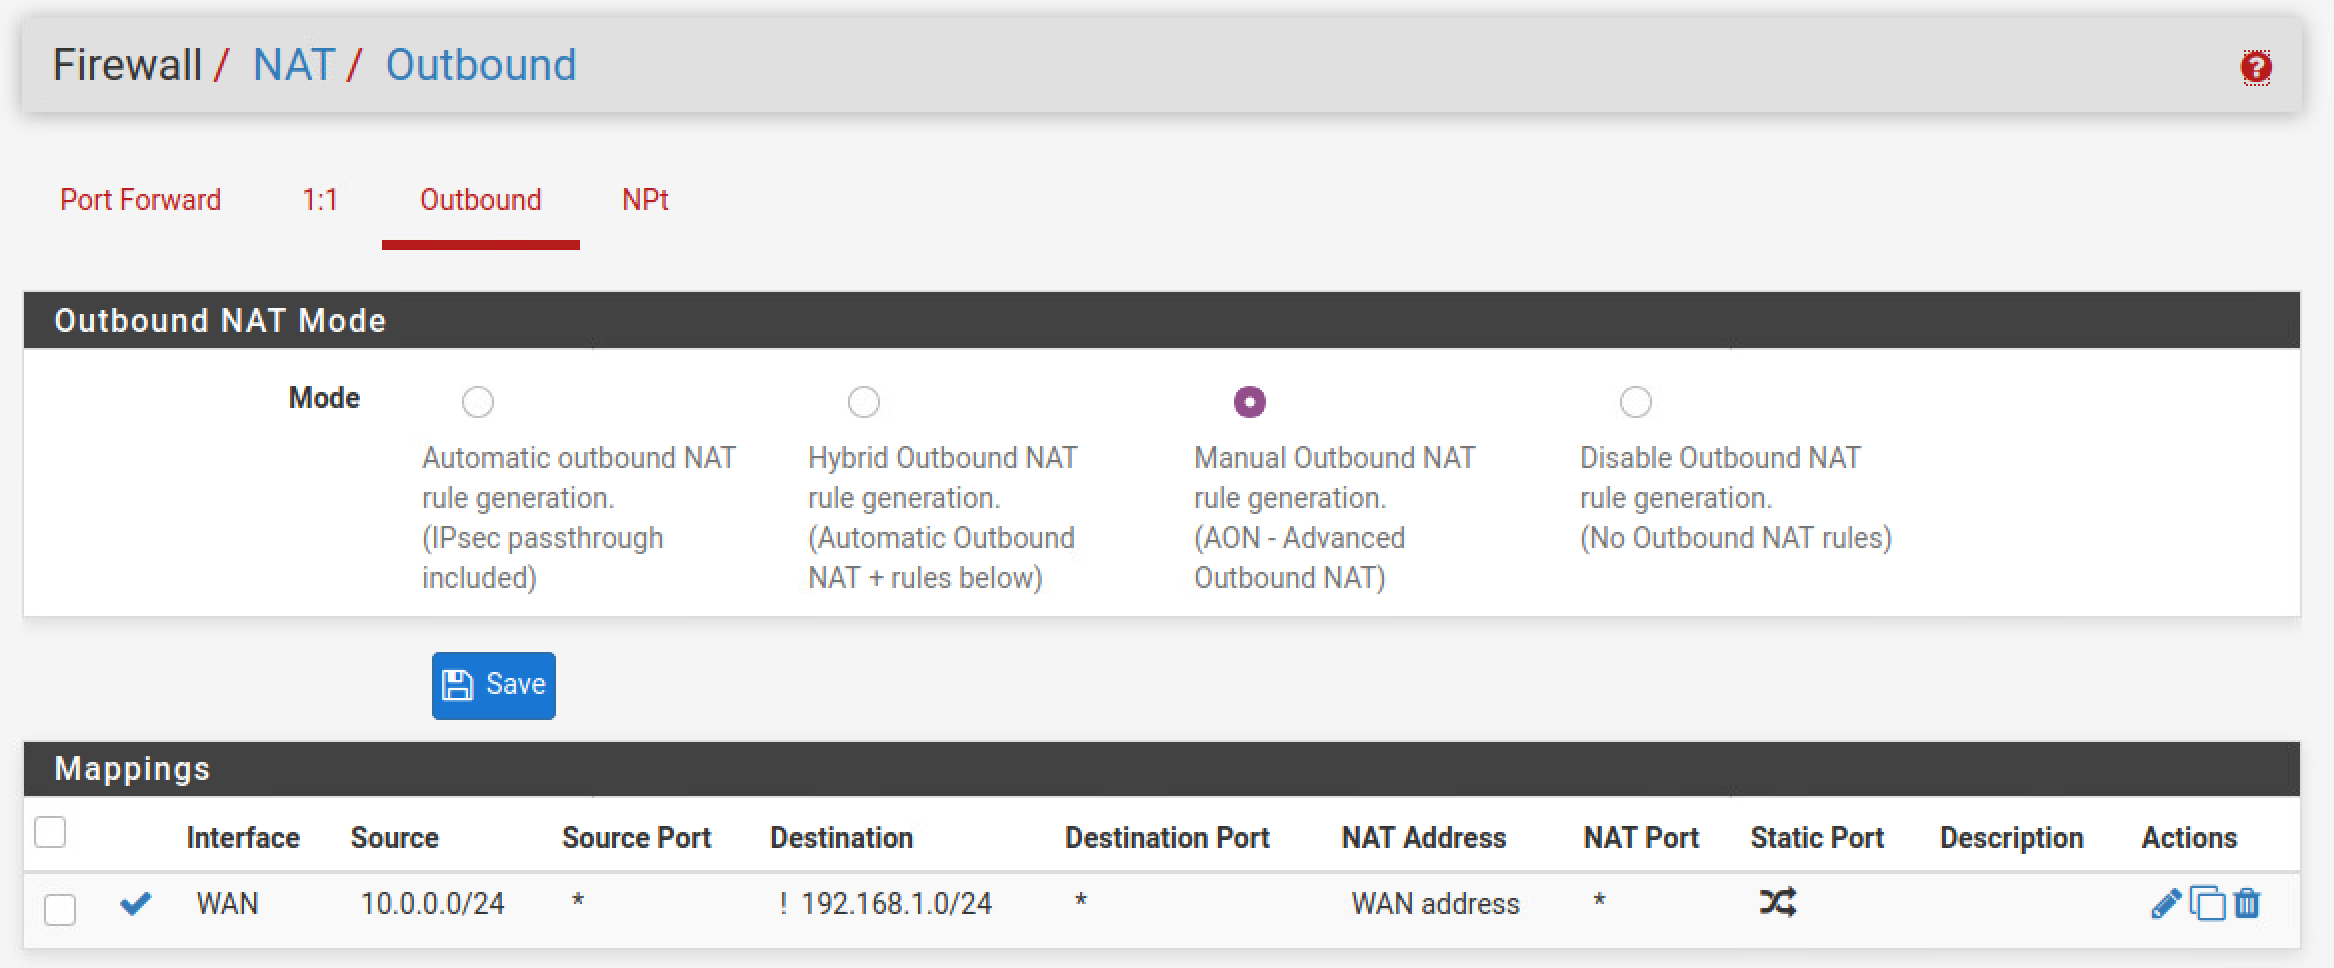
LAN Rules (and a word about NAT) - This is where you get most of your isolation. You can prevent LAN -> WAN communication in two ways. One is adjusting the default NAT rules so that any outbound traffic is not translated to 192.168.1.0/24. The second is to create a firewall rule, I prefer using both as an extra safety measure.
|
|---|
| LAN Isolation #1: Manual NAT |
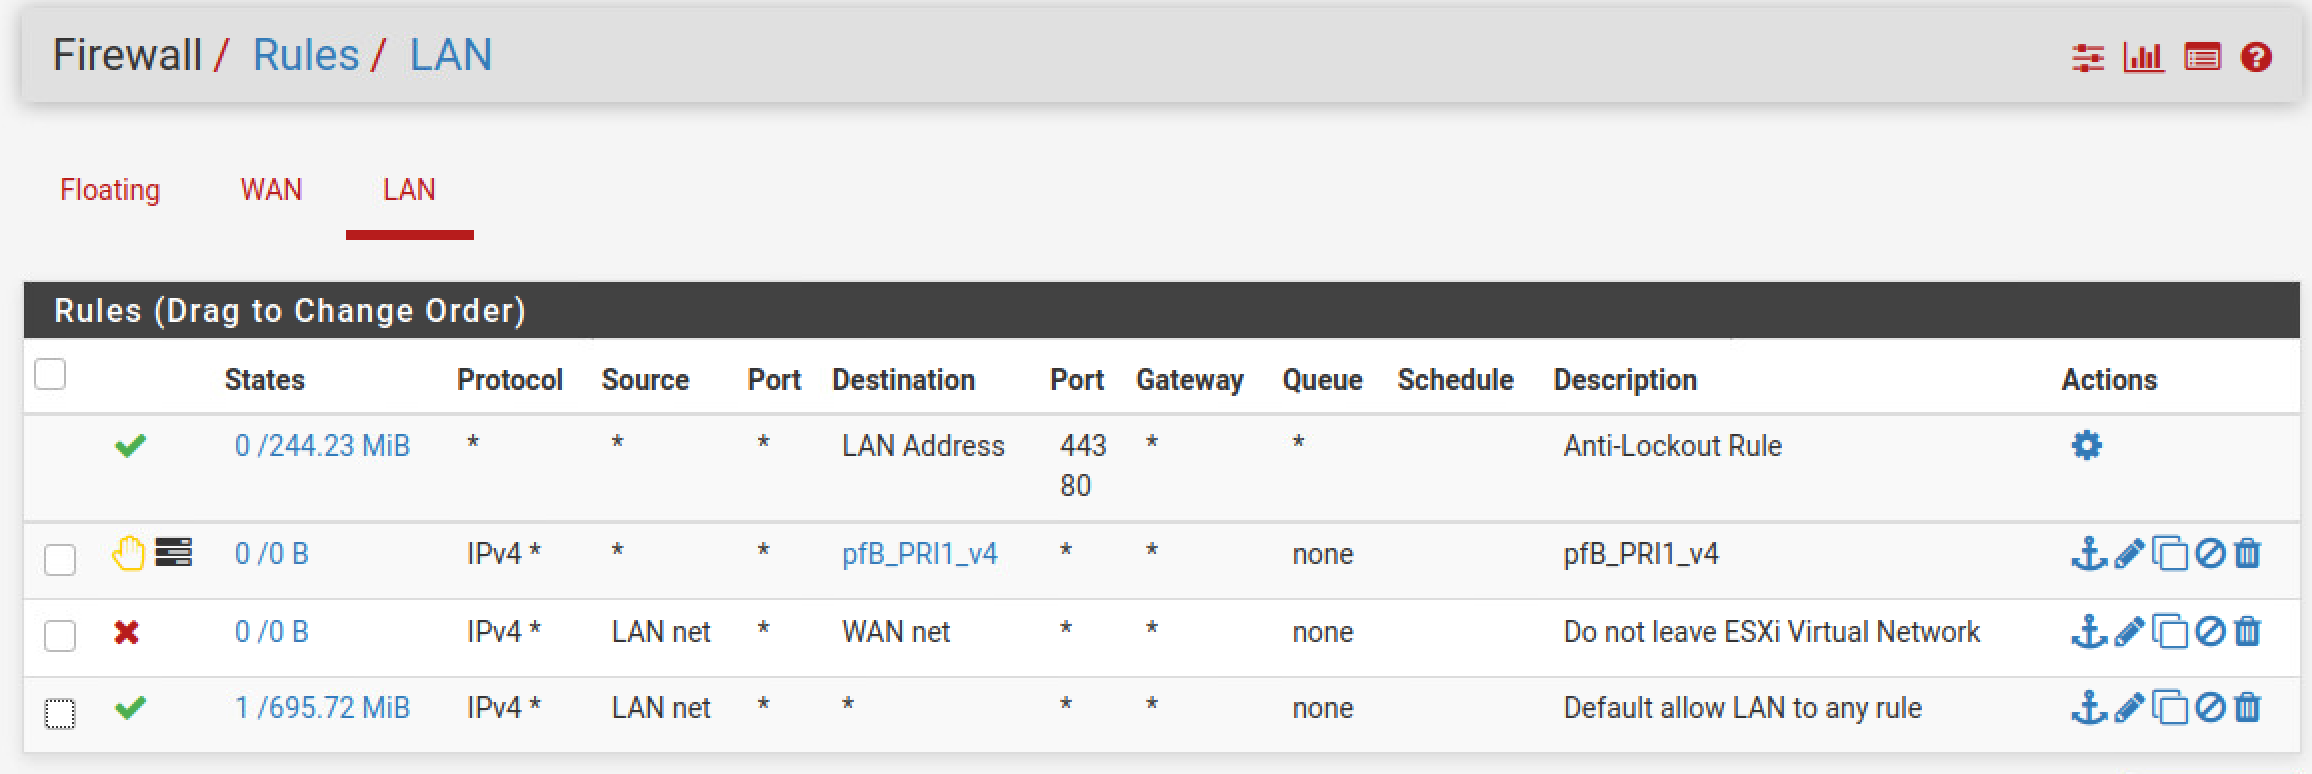
For your LAN Firewall rules, make sure you have a rule to block any LAN -> WAN Traffic (Line #3).
|
|---|
| LAN Isolation #2: A sample. Note the second rule is not necessary. Its for pfBlocker-ng |
If you are new to reading firewall rules the bottom two lines can seem counter intuitive. pfSense like many other firewalls are “first match” meaning that anything on the LAN destined for the WAN will hit the block rule (3rd line) and not be allowed (4th line). If you need to troubleshoot, pfSense has great documentation on rule processing.
After hitting save and reloading your filter, you should not be able to access your firewall from the WAN side. Now it is time to test out our isolation!
Isolation: Verify
Whatever your configuration or firewall rules are like, you need to verify them for yourself and use an automated means of doing so! This is great practice in general, don’t trust some random guy on the internet and copy settings blindly.
You can try using ping or SSH to hoists on either side of your network, but its best to use something like an nmap scan. Thankfully, there is a nmap package for pfSense! Go into pfSense’s package manager and search for nmap and then install it.
You can use the pfSense GUI (Diagnostics -> nmap) , but it is somewhat slow and I prefer the CLI version.
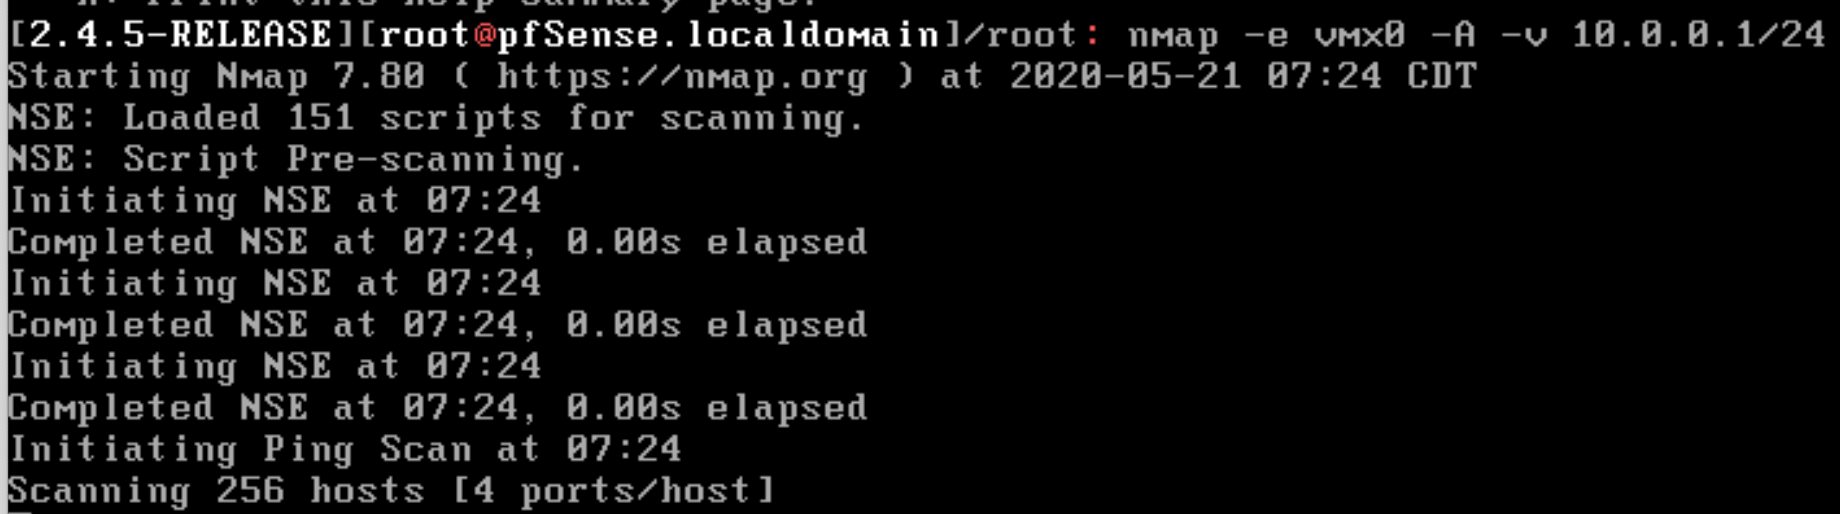
Here is how we go about it, go ahead and drop to a shell. See how vmx0 is our WAN interface. We can tell nmap to scan our lab network (LAN) from the WAN interface. If you did this right, you should get zero 0 hosts up.
|
|---|
| We want to try and scan the WAN IP space using the LAN interface and vice versa. |

|
|---|
| You should see something like this! |
You should also try this in the other direction and see similar output. “nmap -e vmx1 -A -v 192.168.1.0/24”.
Conclusion
Now you should have an isolated Lab network on your ESXi machine that you attach to your guest VMs and play around with all sorts of software that you wouldn’t necessarily want floating around your “trusted” home network.
As always, remember your OPSEC if playing around with malware.
If you wanted to get more into virtualization and InfoSec research/homelab, I hope this guide has helped you.
Until next time,
-Justin
If you have any comments or corrections, you can reach me at @dfir_justin or any of my contact methods.